I installed my Hartley greenhouse in November 2021 but had to wait until the summer of 2023 to complete the landscaping around the greenhouse. Part of this was taking the time to think through what I wanted, part was finding someone to build what I wanted to achieve. One of my challenges was to marry our old landscaping with the new areas. I wanted a look that matched the style of the Hartley but blended in with my original hardscaping. While I had a few hiccups along the way, at the end of the day, I’m super happy with the outcome.
The Design
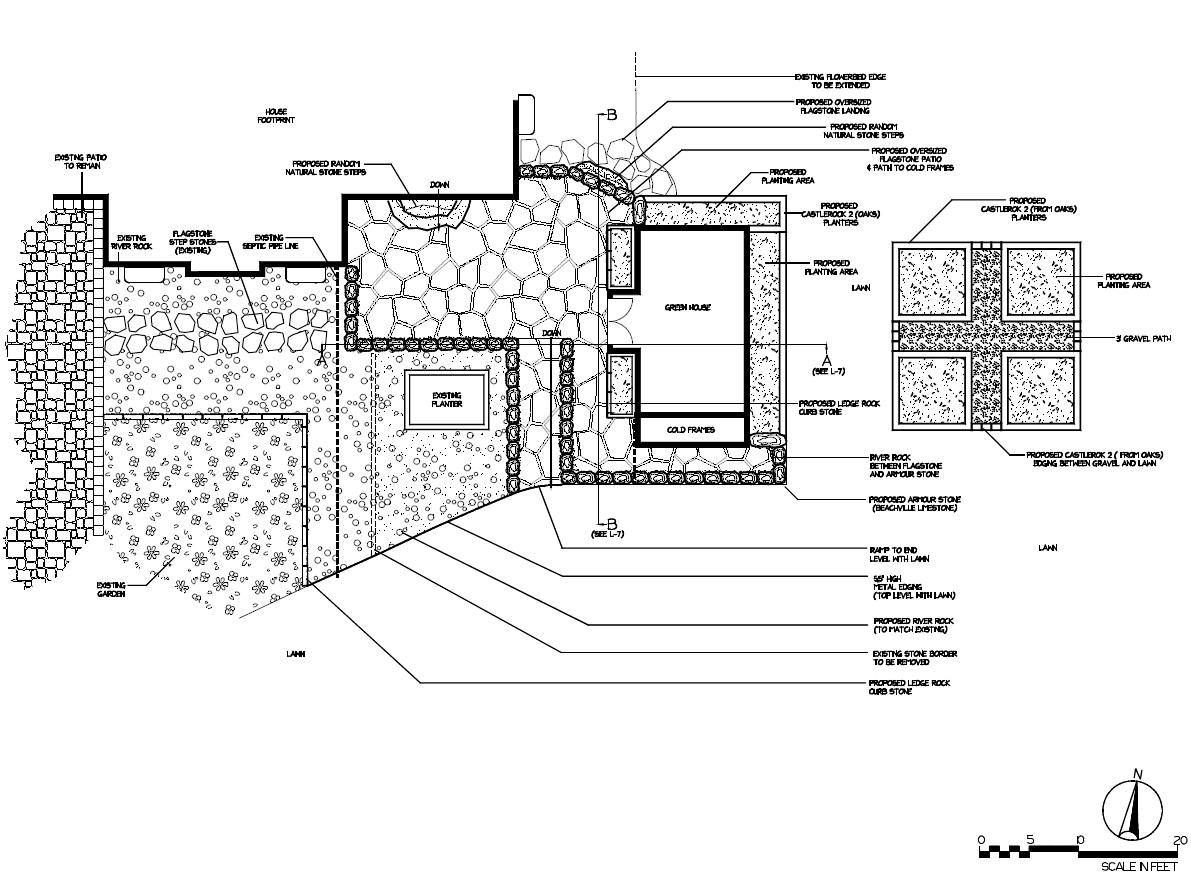
The first step was to create the overall design. I had already drawn up a rough plan to discuss with the designer and had a few specific features in mind:
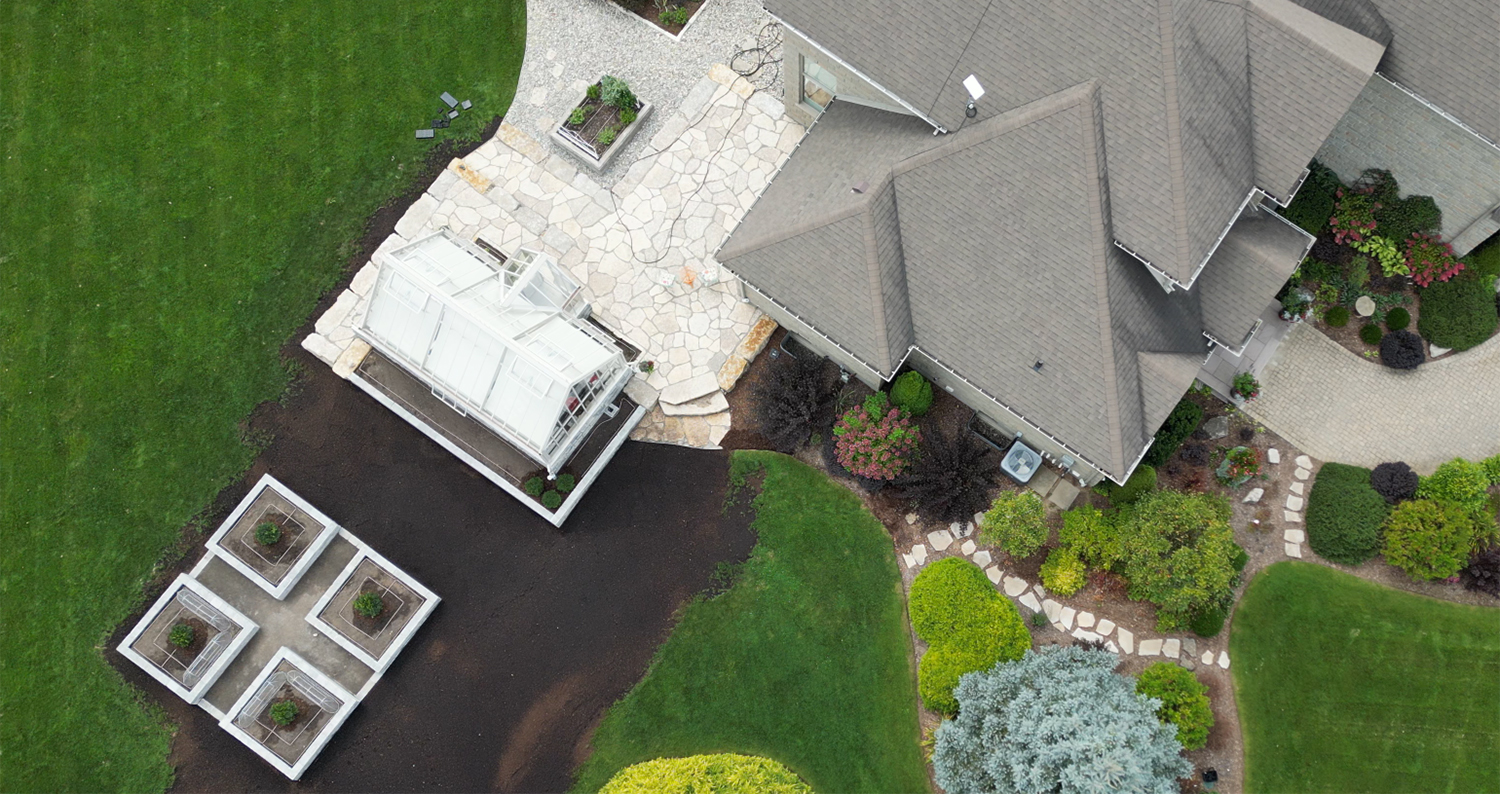
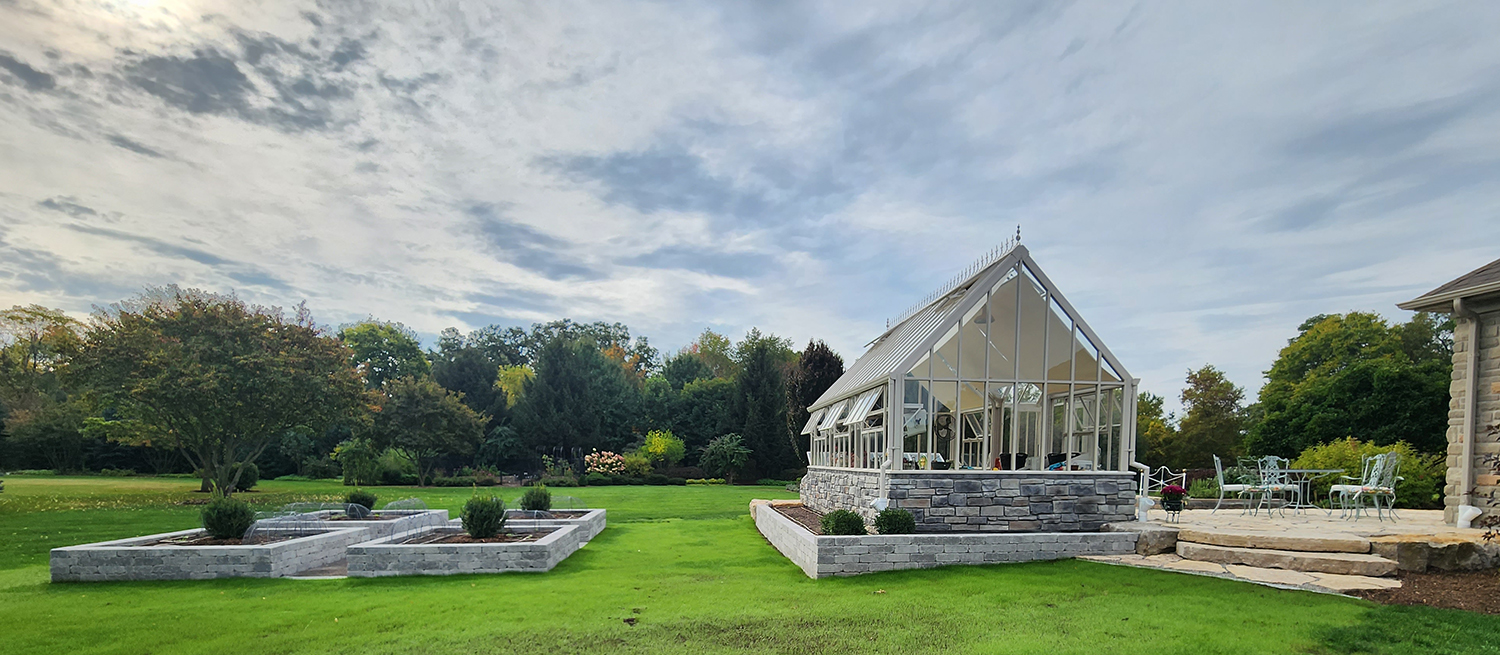
- I wanted one large patio that blended the old bedroom patio into the new greenhouse area. Unfortunately, that meant ripping out the original patio stones to replace them with one large flagstone patio. I went with flagstone for two reasons. First, our original pavers were no longer available having been installed 15 years ago. Second, I wanted the transition from the old landscaping to look seamless and I already had flag stepping stones between the kitchen garden patio and the original bedroom patio so it made sense to carry this look further.
- I wanted a ramp rather than steps from the grass area to the top of the patio, a rise of about 20 inches. The ramp allows me to pull my garden wagon up to the greenhouse doors rather than carry in supplies.
- I added raised planters along the north and east walls of the greenhouse. The idea was to ensure there was a buffer zone next to the greenhouse for lawn cutting and the addition of colourful plants around the greenhouse will look nice I think.
- I wanted two in-ground beds for annuals to the left and right of the door to provide some colour in front of the greenhouse.
- To simplify the look, I extended the river rock (which already surrounded the existing flag stepping stones and covered our septic tanks) to the mulched area around the existing herb bed (which was my old greenhouse!)
- I wanted a small work area near a water tap from the house. Eventually I plan on putting an outdoor work sink in that spot.
- I added steps down to the east gardens which also provide easy access to the front of the house
- Lastly, I added four square raised beds to the east of the greenhouse as an area for strawberries and new perennial production, or whatever I decide.
The Stone
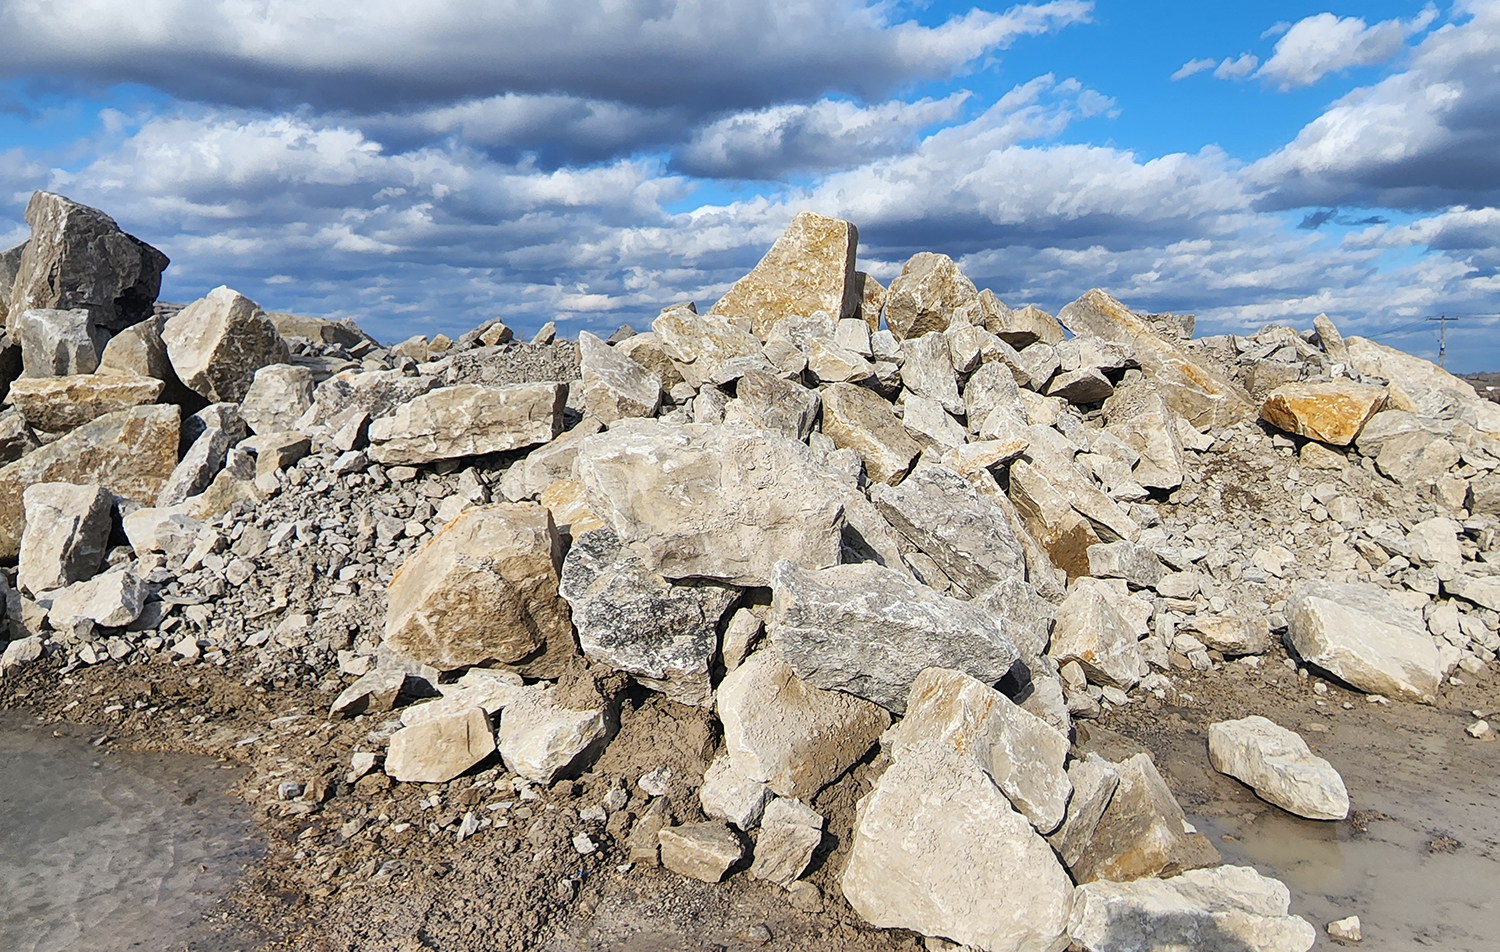
I decided to go with large flagstone and armour stone for the main patio. However, I didn’t want the typical cold grey flag or stone blocks. My house brick has some grey but a lot more buff giving it a warmer tone. While the greenhouse has cooler grey stone along the bottom, I wanted the patio to look like a neutral floor with the same warm tones as the house. Choosing a more neutral colour consistent with the house would also allow the greenhouse to pop as the main feature.
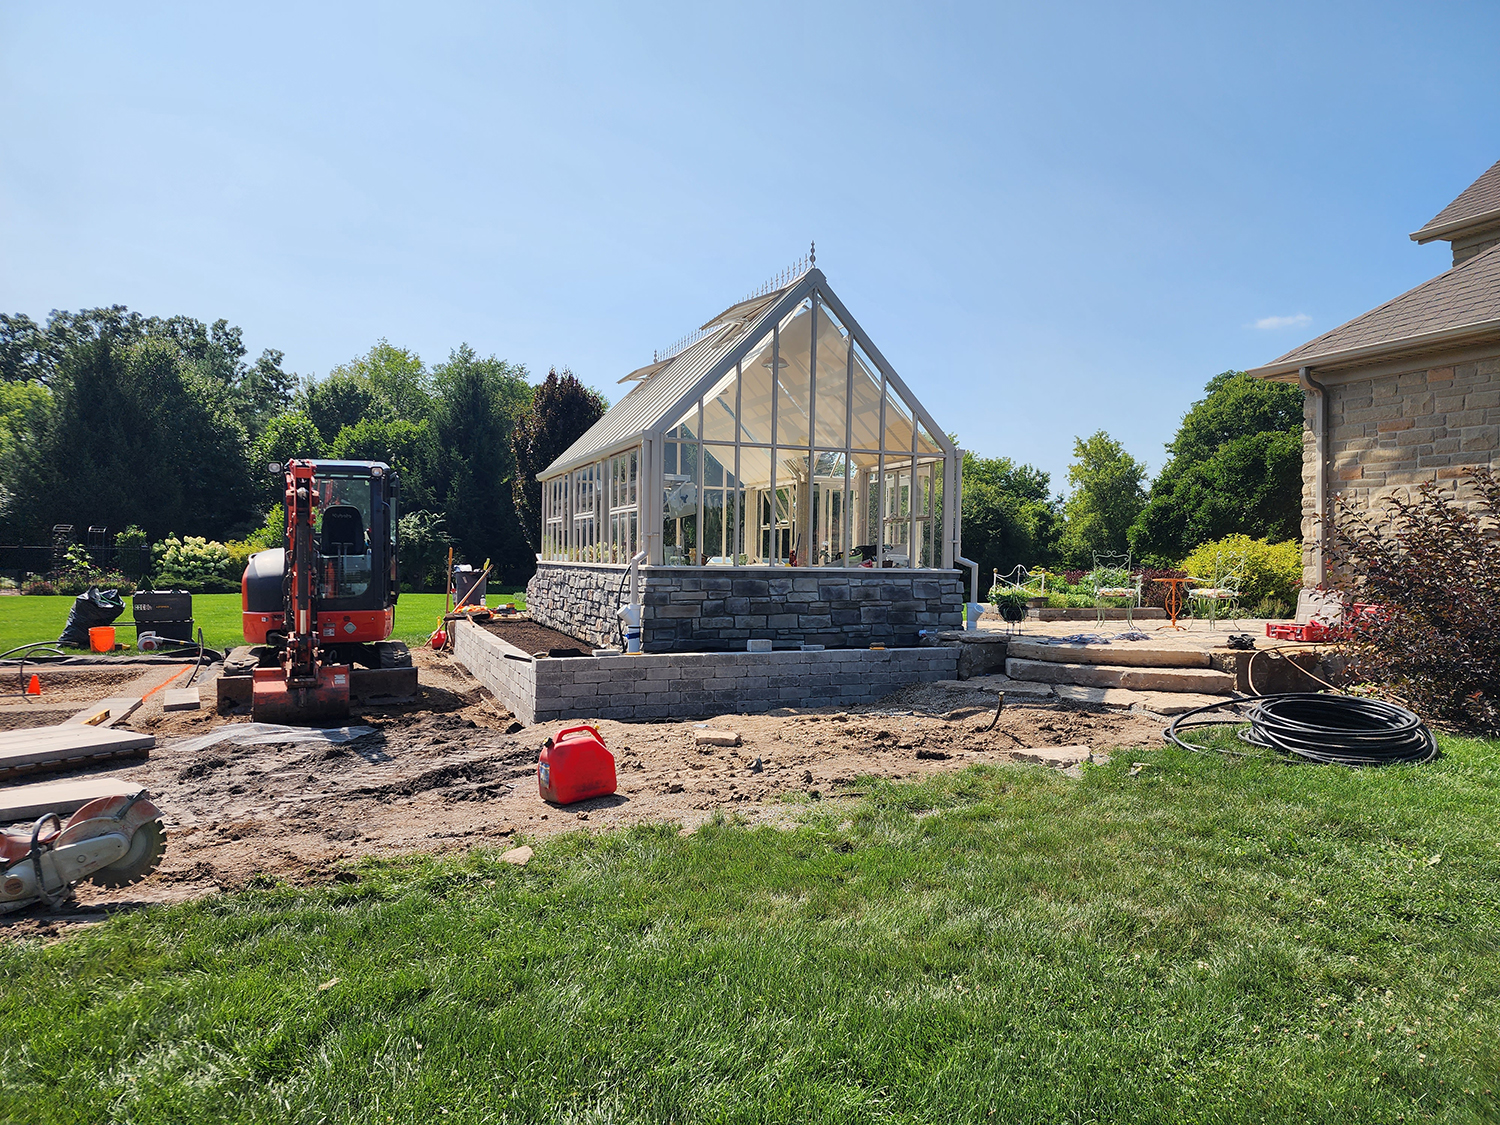
This turned out to be more challenging than I thought. After a LOT of back and forth and a little angst here and there with the landscapers, I ended up with the look I wanted. For the patio retaining walls, we used Beachville limestone from Bluecon, a quarry just outside of London Ontario. To ensure the stone was the colour I wanted I drove to the quarry in the middle of February. You can see from the picture below a lot of buff, brown and orange tones in this section of stone. That’s what I was looking for with a small mixture of light greys and black where it existed as this was, after all, natural stone.
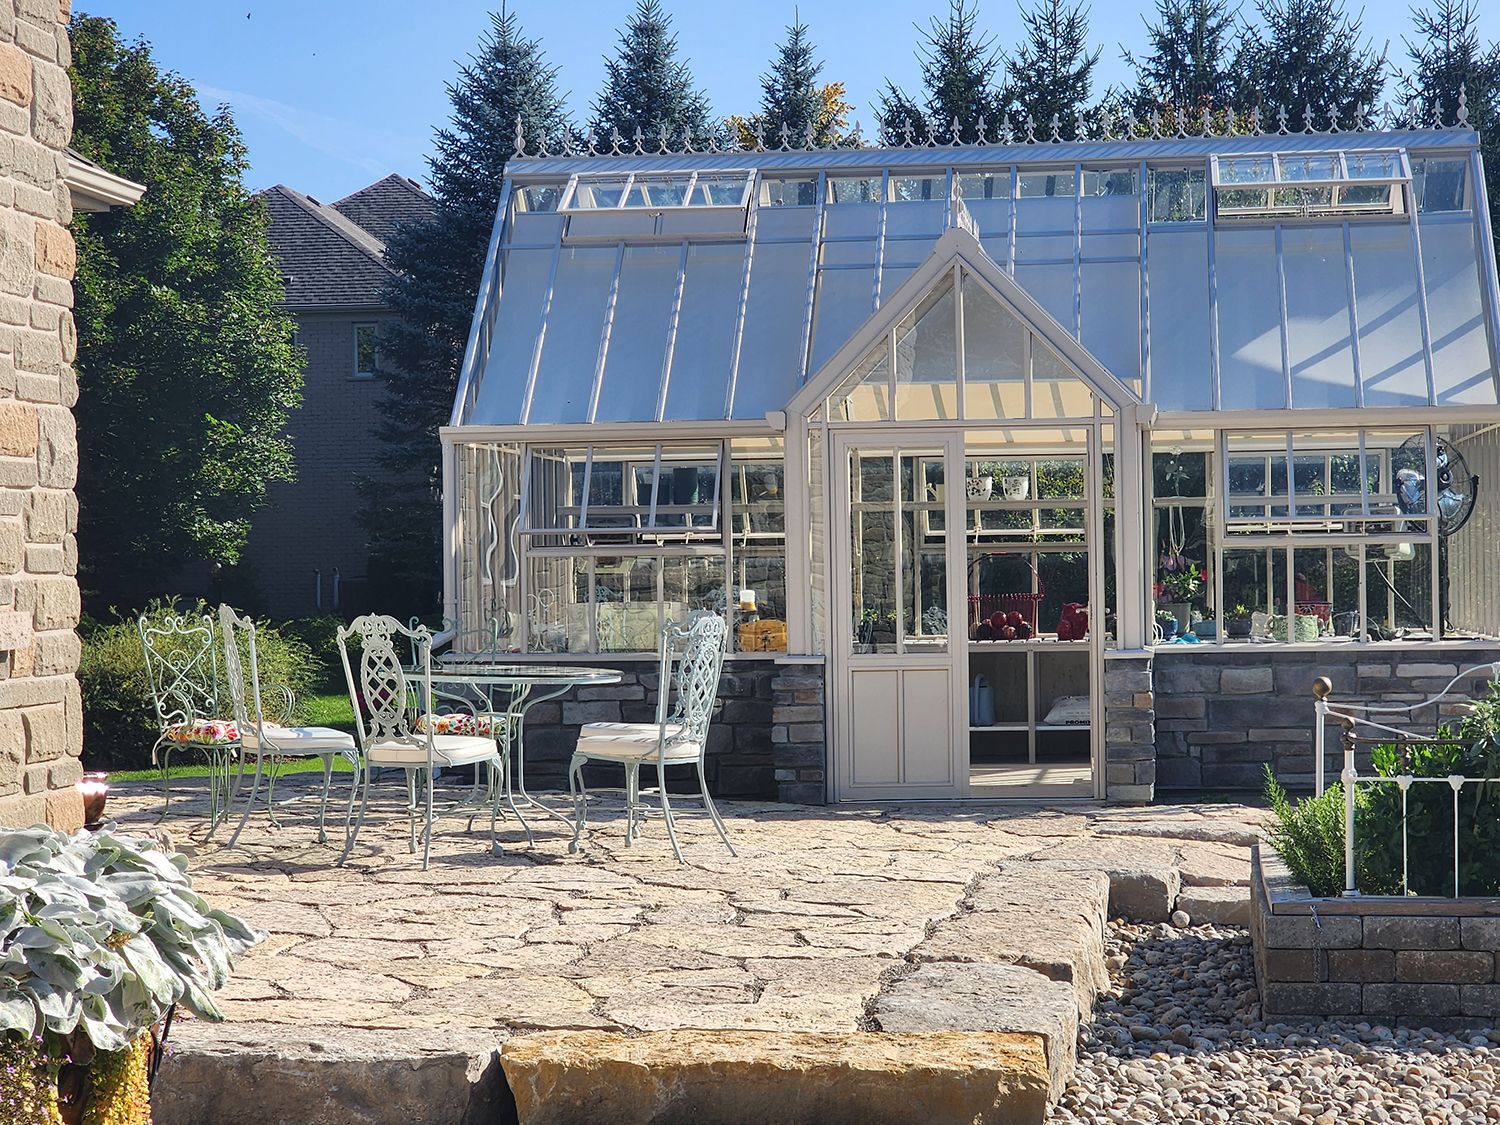
Unfortunately, while the landscapers thought they could source flag from this they could not. Instead they installed alternate stone they chose which was a blue grey. After a day of mild panic I had them remove the section they started and we once again went stone shopping. I ended up going with Peninsula Brown Flagstone from Marco Stone for the flag section. I’m really happy with the end result. It has a very French chateau feel which is what I was looking for.
For the raised beds I went with man-made pavers that closely matched the existing herb bed to keep the theme relatively similar. I also liked the contrast between the natural stone and more formal straight lines for the raised beds.
Installation
I’m purposefully not mentioning the name of the landscape company I used because, in all honesty, the process was a bit of a nightmare. Many mistakes were made that should not have been and I had to check several times a day to ensure issues that arose could be adjusted quickly. Much of this was due I think to the designer not really listening to what I was asking for and certainly not translating what I mentioned to the production team on site. Oddly, the designer never shows up during installation to make sure everything is going as planned. Even then, we had many issues on site with a lack of communication from one crew change to the next. The best positive thing I can say is that they did work to make things right although towards the end they were clearly in a hurry to finish which resulted in some other issues. You can see from the image above for example how compacted the ground still is around the work area, despite my asking (and willing to pay for) better remediation. No worries, I’ll deal with that in the coming year.
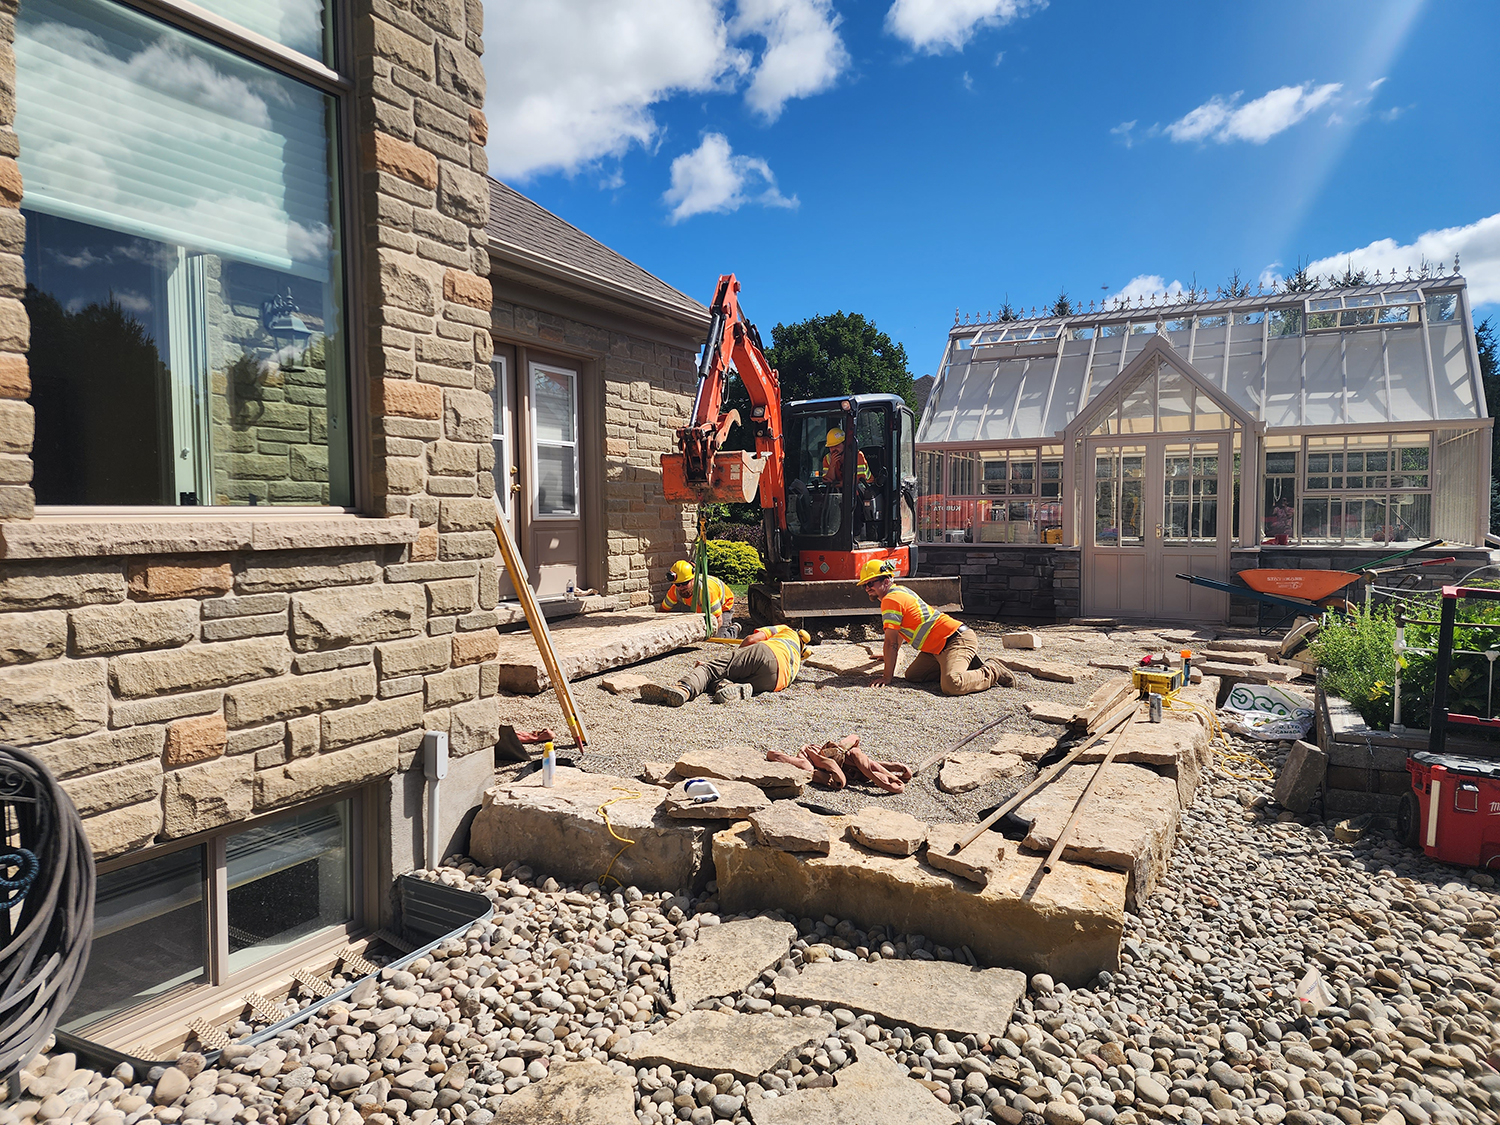
It was certainly a big project, and as with all projects, took way longer than anticipated. We were slated to start in May but did not begin until early July. Most of the work was completed by labour day.
As I said, I am super happy with the outcome and look forward to filling all the beds with plants and annuals and the patio with furniture and some large planters that will suit the area.